
Every button and menu name below is the label the app uses. You need a Mac running macOS 14 (Sonoma) or later, on Apple silicon or Intel. If you have not downloaded Outbound Veil yet, the free trial is on the Outbound Veil page.
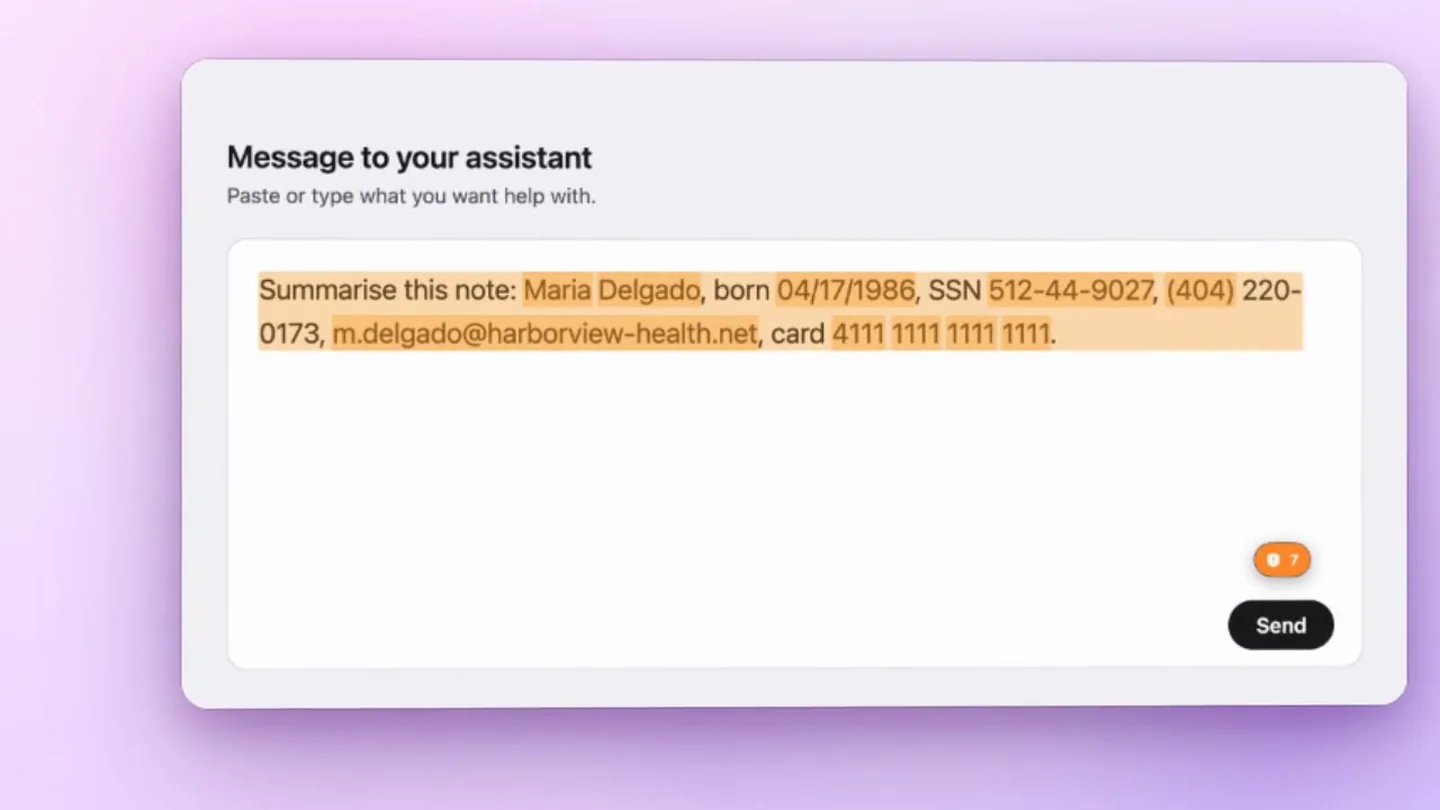
The video is under a minute of the app on a made-up note. The steps below cover the same ground, plus the parts that are not on screen.
1. Install
Open the disk image you downloaded and drag Outbound Veil to Applications, then open it from there. The disk image is signed and notarized by Apple.
The first time you open it, macOS shows a dialog that says “Outbound Veil” is an app downloaded from the Internet. Are you sure you want to open it? Choose Open. macOS asks this for every app downloaded outside the Mac App Store, and the same dialog says Apple checked the app for malicious software and found none.
Outbound Veil has no Dock icon and no main window. It lives in the menu bar, at the right of the menu bar, as a small text cursor with two wavy lines across it. Open the app and a short welcome guide appears.
The trial is the complete app for seven days from the first time you open it. There is no account and nothing to enter. In the trial, the menu bar menu shows how many days are left and a Buy Outbound Veil... item.
2. Allow Accessibility
The welcome guide has three pages. The second asks for Accessibility. macOS makes every app ask for this before it can read what is in a text field, and Outbound Veil has nothing to check without it. It reads only the field you are typing in, and only to check it.
- Choose Open System Settings in the welcome guide.
- Under Privacy & Security, open Accessibility and turn on Outbound Veil.
- Come back to the welcome guide. It says Access is on. and moves on by itself.
If you closed the guide before granting access, the menu bar menu shows Grant Accessibility access.... The menu bar mark shows a hollow ring while access is missing. Welcome guide... in the same menu opens the guide again.
The third page offers an optional send hold. You can skip it now and turn it on later, per app, in Settings. Step 5 covers it.
3. Try it on a made-up note
Open TextEdit, start a new document, and type or paste this. Every detail in it is invented:
Summarise this note: Maria Delgado, born 04/17/1986, SSN 512-44-9027, (404) 220-0173, m.delgado@harborview-health.net, card 4111 1111 1111 1111.
A moment after you stop typing, the details are highlighted in the text and a small badge appears near the field with the number of findings. Values that look obviously fake, such as phone numbers starting 555 or addresses at example.com, may not be flagged, so use the sample above rather than your own placeholders.
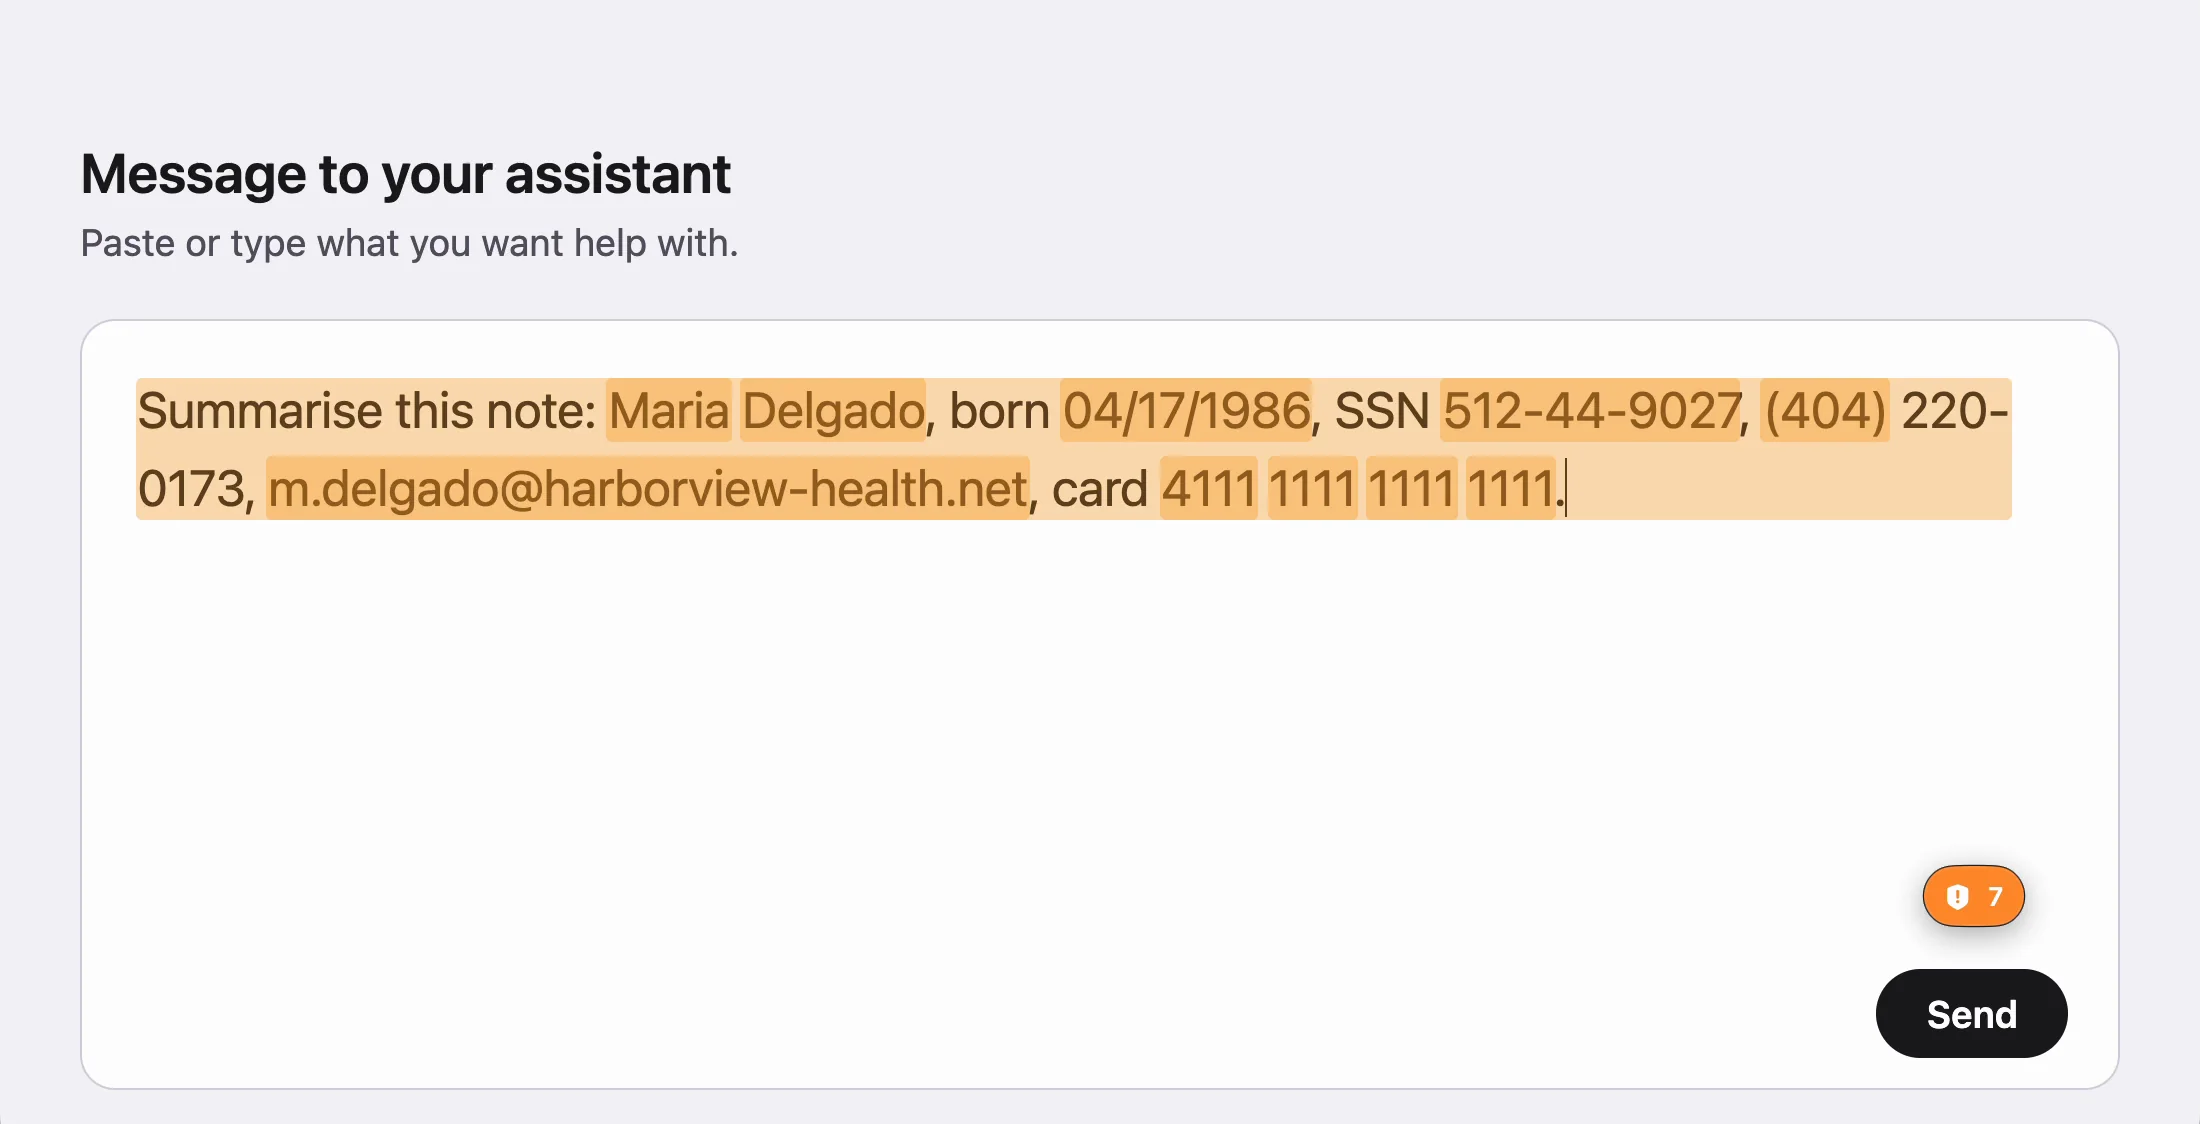
The highlighting works word by word in TextEdit, Notes, Microsoft Word and plain text areas in Chrome. In some apps macOS does not say where each word is, and then Outbound Veil outlines the whole field instead. The product page lists what was tested.
4. Redact in one click
Click the badge. A list opens titled Personal details in this field, with each finding by kind (first name, last name, date of birth, Social Security number, phone number, email address, card number) and an Ignore button beside it.
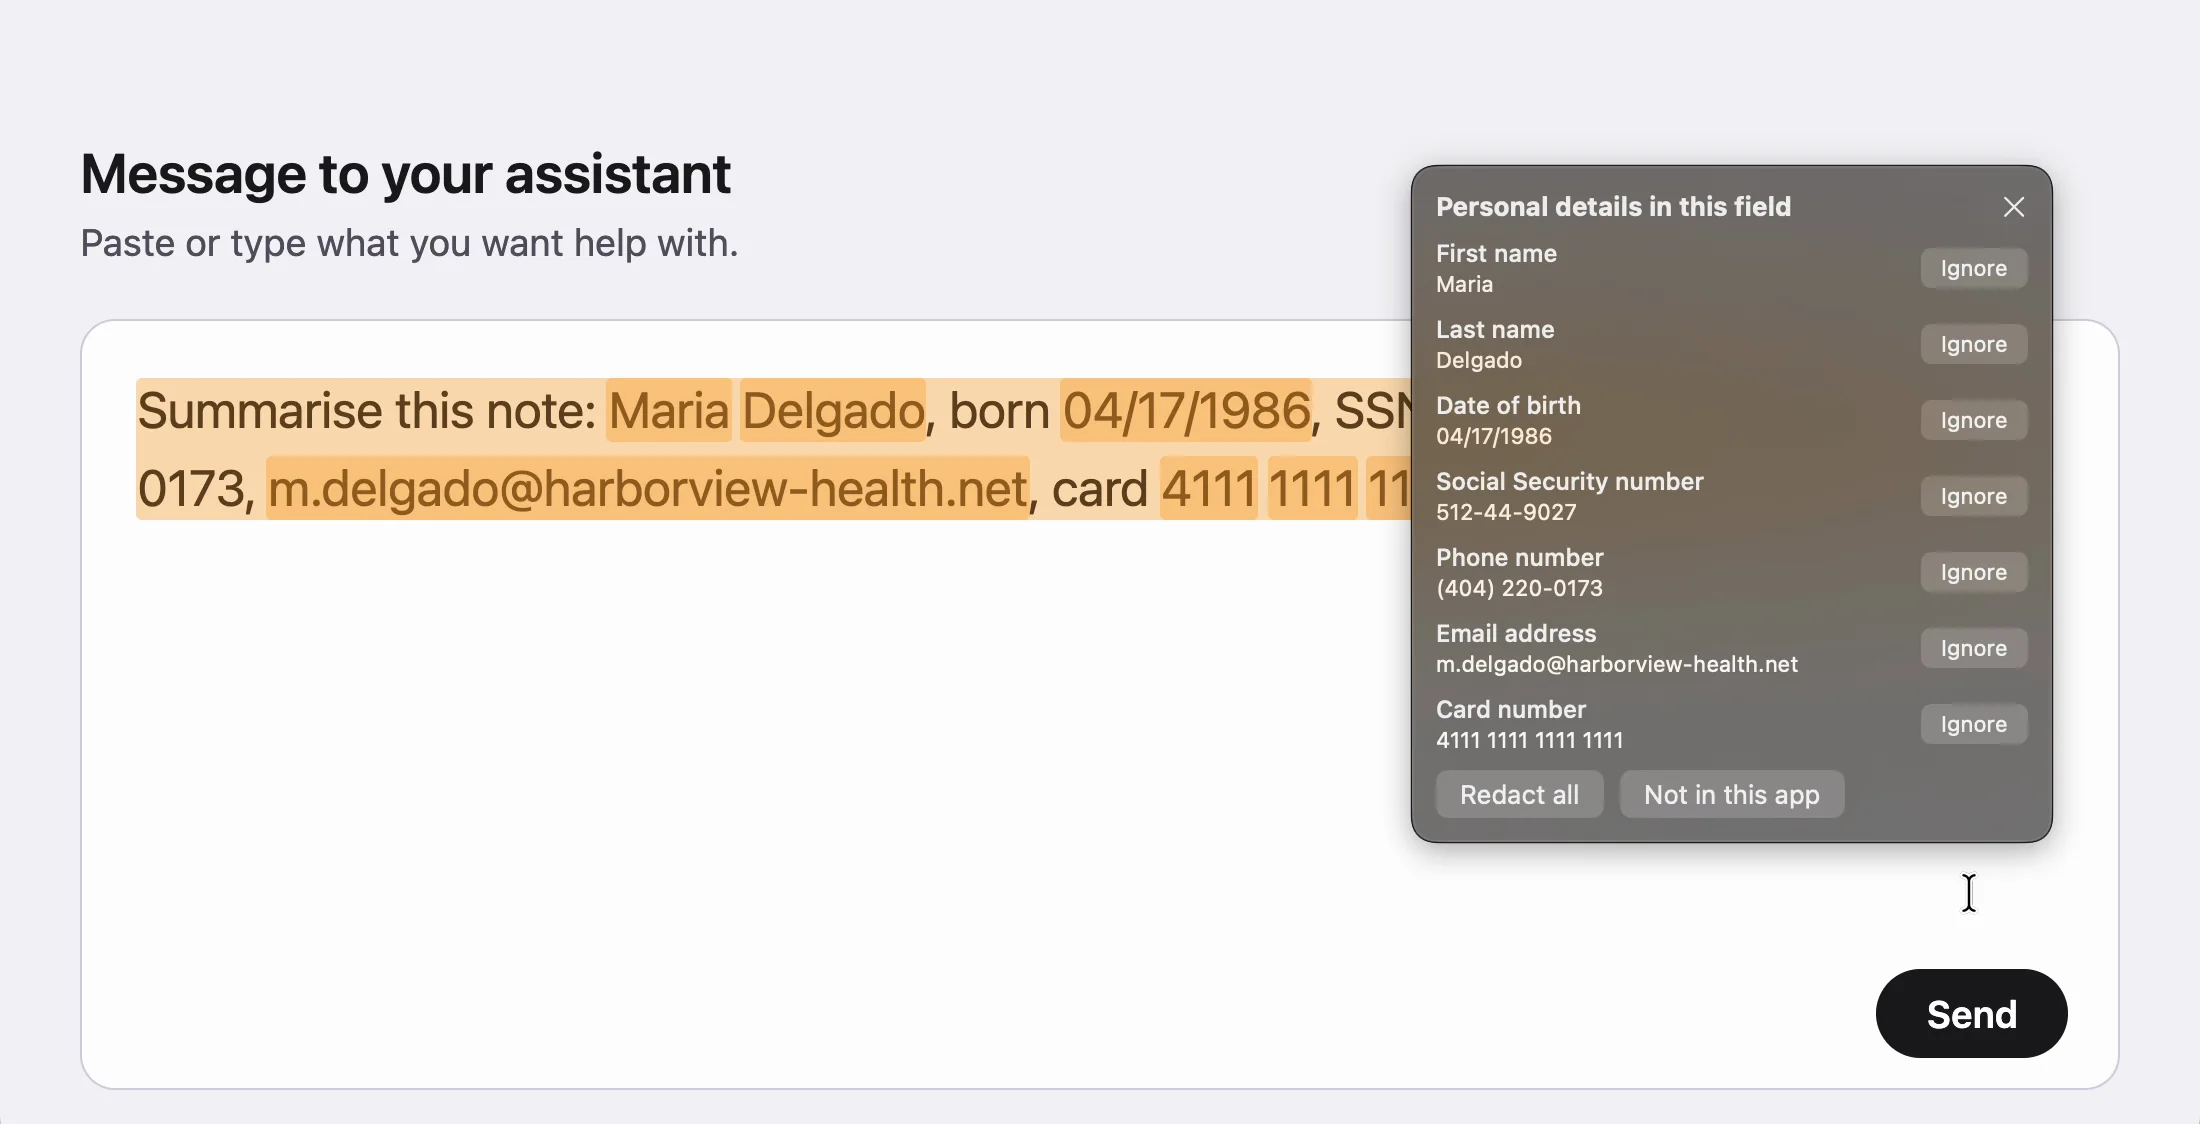
Choose Redact all. Each detail is replaced in place by a labelled placeholder such as [SSN_1] or [EMAIL_1], so the text still reads sensibly when you send it, and the badge turns green. Not in this app switches checking off for the app you are in, which you can undo from the menu.
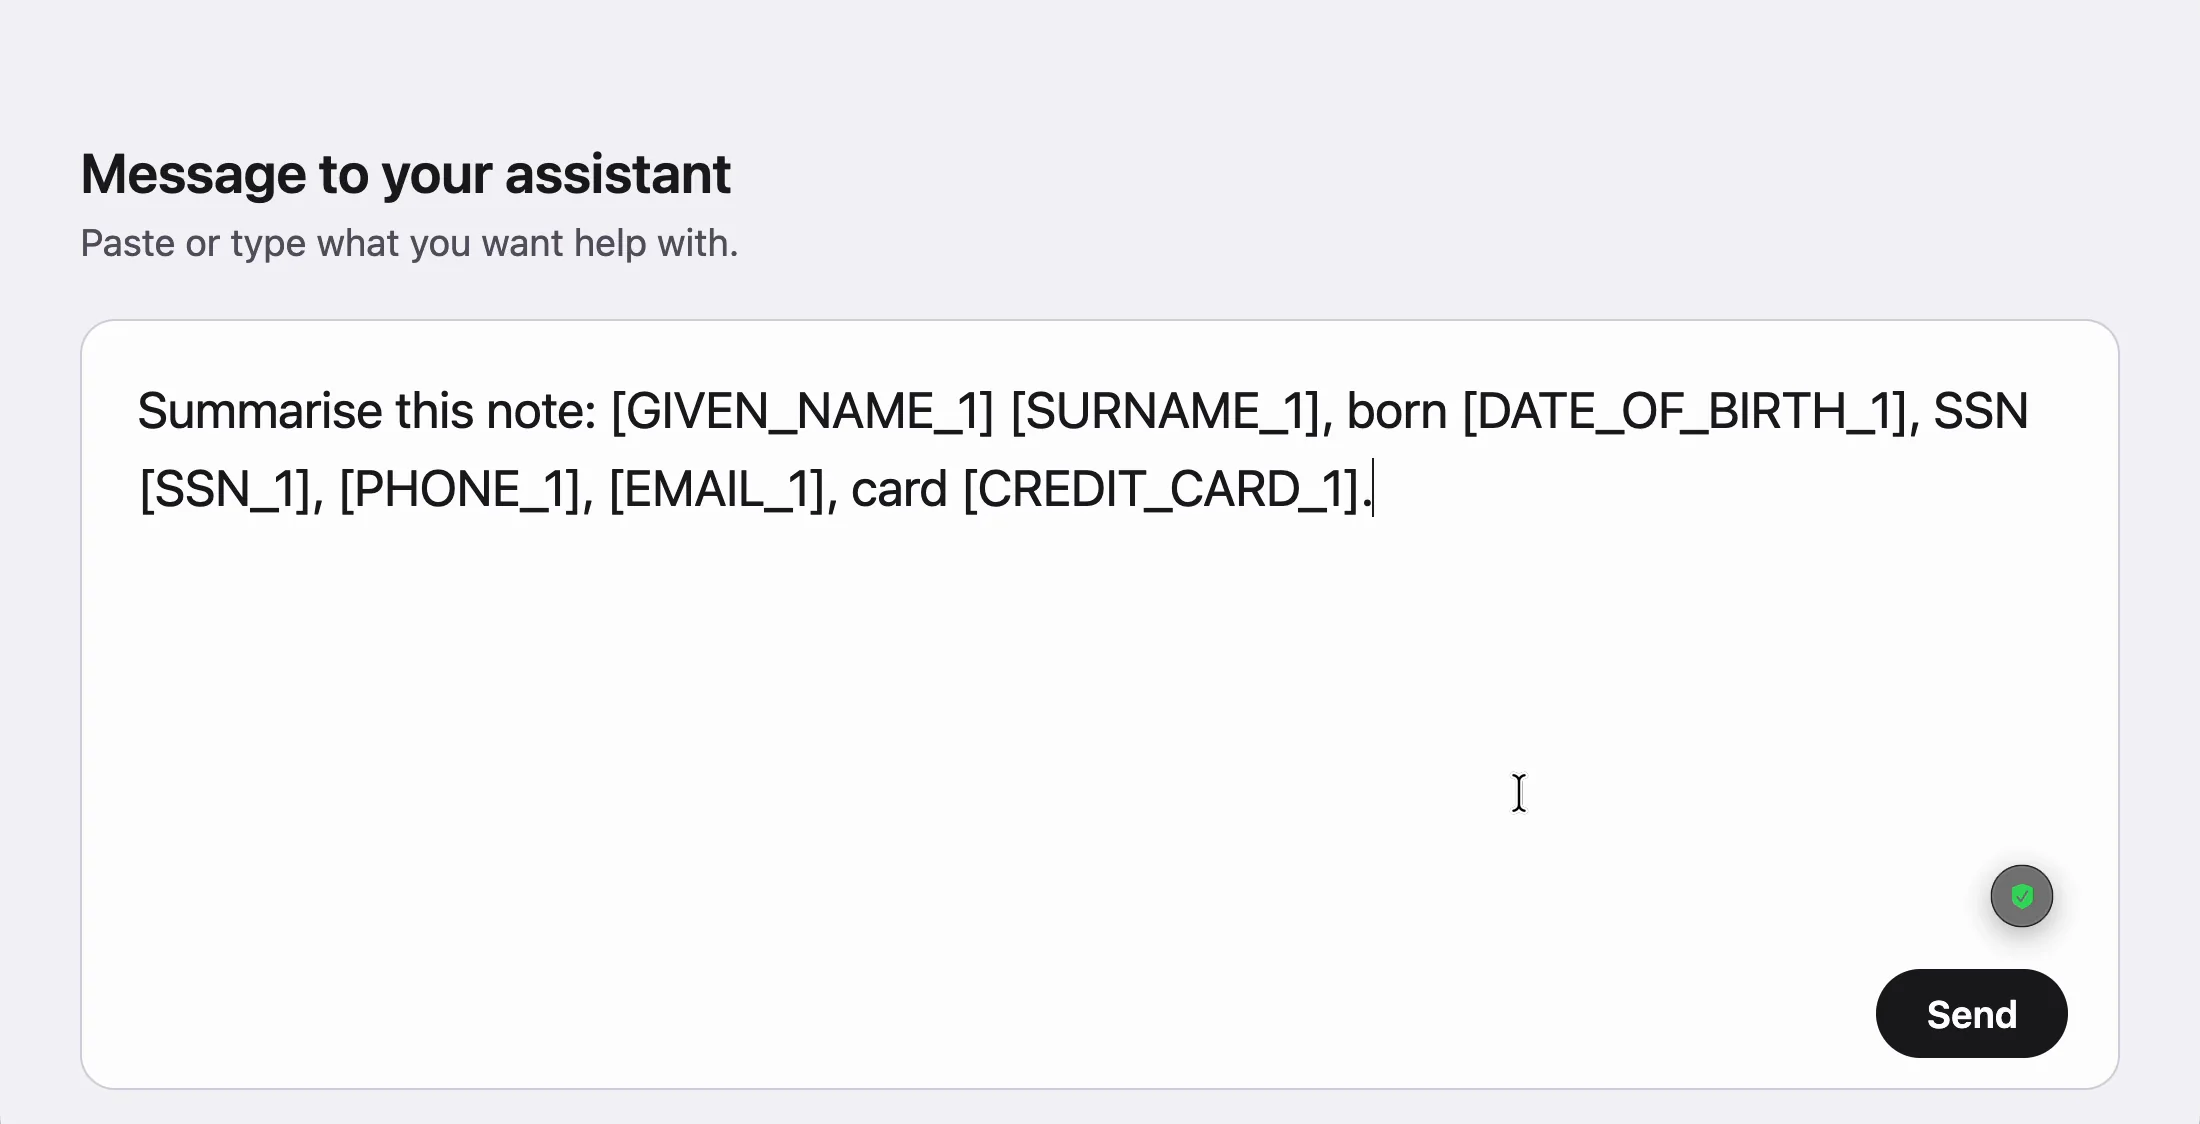
Outbound Veil lowers the chance of sending something by mistake. It will miss some things, flags some things that are not personal information, and recognizes names in Latin script only, so read anything important yourself before you send it.
5. Choose which apps it watches
Open Settings... from the menu bar menu, or press Command-comma. There are four tabs.
- General: switch checking on or off, open Outbound Veil when you log in, see the permission status and the trial days left.
- Highlights: colour, strength and style of the highlights, with a live preview on text you can edit. The same switch is in the menu, and Control-Option-H turns highlighting on or off from any app.
- Apps: for each app choose Do not check, Check and warn or Check and hold send. Terminal, password managers and Keychain Access start as Do not check, because their fields hold secrets by design or expose a whole scrollback. Add an app... lists any other.
- About: version, and the credit for the detection model.
Check and hold send holds the send key while a message contains something. A panel offers Redact all, Send anyway or Cancel. It needs one more macOS permission, Input Monitoring, which the app asks for only when you turn a hold on. It works in Messages. Where an app does not let macOS read its message field, there is nothing to hold.
What about ChatGPT and claude.ai in the browser?
Outbound Veil reads the prompt box and warns you before you send, and Redact all rewrites it in place. In those two sites macOS does not report where each word sits, so the whole box is outlined instead of each detail being highlighted. Plain text areas in Chrome get word-by-word highlighting.
6. When the trial ends, and updates
After seven days the trial stops checking and shows one notice with a link to buy. Outbound Veil is $29 once, with updates included. Buying gives you a separate download of the full app: install it over the trial copy. There is no key to enter.
The full app checks for new versions and offers to install them in place. Check for updates... in the menu does it on demand. Outbound Veil is also in the Mac Suite with ModernTex and Vitae Plus for life, $39 once.
If something goes wrong
- No badge appears. Check that Outbound Veil is turned on under Privacy & Security, Accessibility, and that you are not paused (the menu shows Pause). After a macOS update, turn the Accessibility switch off and on again.
- The menu says it cannot read a field. That app does not expose its text to macOS. Mail's compose window is one such case. Outbound Veil says so instead of pretending to check.
- Checking is off in one app. The menu item for the app you are in changes between Do not check this app and Check this app again.
- For a support email. Copy details of the focused field in the menu copies which app and kind of field you were in, without what you typed. The support page says what else to include. One person reads and answers every message.
- Uninstall. Choose Quit Outbound Veil in the menu, drag the app to the Trash, and remove it from the Accessibility list if you like. It stores only your settings and the trial start date, never what you typed.
What Outbound Veil checks, how it works and its limits are on the product page. The detection model is Rampart by National Design Studio, used under CC BY 4.0.